Monday, July 31, 2006

5 Outdoor Decorating Tips

We all love putting out fresh new looks in our homes this time of year, but have you thought recently about the outside? Often we're so busy decorating or redecorating inside, we forget to do the same outside as well. So here are a few quick and easy outdoor decorating tips that will help spruce up the curb appeal of your home:

1. Paint: You can paint the entire house and trim, or simply touch up the trim alone... either way will make a huge impact on how your home looks to the passing public.

2. Porch or Patio: If you already have a porch or patio, simply putting new furniture out can make a wonderful difference in the presentation of your home. Alternatively, you can simply buy new cushions or covers for your existing patio furniture. Other quick patio spruce ups can be as simple as putting out a few flowering potted plants, adding gnomes or statues, or putting a small water fountain into the space.

3. Walkways: Having walkways outside your home add a cozy, homey and inviting feel to the overall outdoor presentation. Just a straight concrete walkway can be spruced up by putting a bit of garden bed edging along each side... putting small solar walkway lights on each side... or planting colorful annual flowers such as petunias on each side. If you don't already have a walkway and want to create one, I think the prettiest are those made of stone. Add an extra decorative touch by making the walkway curve or wind a bit to your front door instead of leading straight there.

4. Yard ornaments: These can be as simple as a small bird house, a pole mounted outdoor lantern light, or even a wheelbarrow with flowers. Putting a little something extra in your yard defines you and your tastes, plus it gives your home a more unique personality that stands out from your neighbors.

5. Flowers, Plants, Vines & Bushes: Probably the most popular way to spruce up a yard quickly is to simply put out some pretty plants, bushes, vines and flowers. Annuals are great for adding dashes of color quickly, because you can usually buy them this time of year in bloom. To get continuous color and greenery, plant some perrenials too. Then once the annuals are starting to die out, you'll have something to replace them. You'll also have the added joy of seeing the perrenials sprout again for several years to come.

Would you like additional outdoor decorating tips? See the rest of this article and related resources at: http://www.diyhomedecorating.com/articles/2006-05/372/
10-tips-for-improving-the-curb-appeal-of-your-house/

© 2006, Kathy Burns-Millyard. Kathy is a professional published writer who loves decorating, gardening, and photography. Please visit HouseDesignIdeas.com for pictures of house exterior decorating and design ideas, and visit DIYHomeDecorating.com for additional decorating tips, ideas, and advice.

Article Source: http://EzineArticles.com/?expert=Kathy_Burns-Millyard

Home Lighting - Creating Illusions with Window Treatments

Windows come in all sizes, shapes and construction. You can create illusions using standard curtains or other window dressings available today. Long drapes are more formal, short curtains tend to be more casual. You can use different styles to add to your interior decorating, such as country, with wide tidebacks and ruffles.

Curtains can help the following problems:

1. Small window – extend the rod beyond the window frame. This will create the appearance of a larger window. More light will filter through the opening.

2. Large window - Attach your rod in the normal position. Try using tiebacks on the curtains. Use a valance.

3. Short/Tall windows - For short windows attach your rod above the window frame. Taller windows will appear shorter if you use a draped valance. It will soften the window.

4. View – If your purpose is to hide the view, match the window color to your wall covering. It will reduce attention to the window.

Today there are so many choices - Vertical blinds, miniblinds, wood blinds, curtains, material and fabric shades, and shades of all types. You can keep it simple or layer the materials. Investigate the choices before you finish your room. If you give this some forethought, you can design your area to allow for changing window dressings each season.

Nan is an Accountant, Real Estate Professional and Business Writer. She has an information site online

HomeLighting and a blog for BusinessTips

Article Source: http://EzineArticles.com/?expert=Nan_Wood

Friday, July 28, 2006

Home Bars

Having a home bar is great for entertaining whether it is a house party or an evening with the guys enjoying a baseball or football game.

Planning a home bar is fun, and if you do it right – you’ll have a great place to enjoy with your family and friends. The first consideration is where to put your home bar. A basement or game room is an ideal spot for a home bar. It really depends on the type of house you have and the type of space you have available. Keep in mind that you’ll need room for a bar, a sitting area, a good size television and a refrigerator. If your space opens up to an outdoor patio, all the better for ""grilling and chilling. ""You’ll have easy access to the grill for hamburgers and hotdogs during a rousing sport’s party.

Okay, so you’ve picked out a spot for your home bar. Now you need to set budget and decide what you want your bar to look like. If you do plan on using it for viewing a lot of sporting events, you might want to decorate with sports equipment and memorabilia. Throw up a few neon lights and signs, and you’ve got yourself a sport’s bar. If you’re going for a sophisticated look, the bar could be mahogany or oak and leather couches will give the area a rich look and feel. Just make sure whatever you plan fits within your budget. The bigger your budget, the better equipped your bar will be. You can have draft taps, running water, refrigerator, icemaker and more working surfaces.

Bars provides detailed information on Bars, Home Bars, Oxygen Bars, Sports Bars and more. Bars is affiliated with Outdoor Bar Stools.

Article Source: http://EzineArticles.com/?expert=Thomas_Morva

Exterior Shutters - Nine Reasons To Remodel With Louvered And Rolling Shutters

Exterior shutters are top-rated window treatment transformers. When remodeling your home, interior design ideas should be balanced with attention to exterior home improvements. With the installation of custom exterior shutters, a benefit bonanza awaits both your family, and your furnishings.

1. Curb Appeal Skyrockets With Exterior Shutters

Whether you use exterior shutters to create a fresh focal point, or to subtly enhance the architecture of your home, the benefit is likely to be seen in an increase in the value of your property. Lightweight, fixed vinyl shutters are inexpensive, yet particularly effective if your aim is simply to add aesthetic appeal. Functional window shutters are more versatile, and feature a number of additional perks.

2. Complement Architecture With Custom Exterior Shutters

Shutter manufacturers thrive on the challenge of designing the perfect window covering for your home. The architecture of your home may come to life with the addition of airy, Caribbean style Bahama shutters. Alternatively, your property may benefit from an introduction to functional fibreglass exterior shutters. These colorful shutters have a wood-like appearance, but are low-maintenance, and often robust enough to warrant storm certification. Perhaps you live in an older home, and are looking for historically accurate window shutter replicas. Home improvement contractors or shutter manufacturers will be able to assist you in making the perfect choice for your property.

3. Set Up A Storm-Shield With Exterior Shutters

Any homeowner in an area known for lashing tropical storms or strong winds, has experienced the devastation that accompanies these onslaughts. The presence of storm shutters or hurricane shutters are reassuring. Wood shutters are commonly seen, as are fibreglass exterior shutters with storm certification. These are reinforced with aluminum, for superb strength. Well-crafted ranges also include a storm bar, which can be engaged from inside your home. This feature serves to protect your window panes. High-caliber aluminum rolling shutters often double as storm shutters.

4. Step Up Security With Exterior Shutters

One of the measures to take if you want to deter would-be intruders, is to install exterior shutters. Wooden shutters can be used for this purpose, or you may consider aluminum rolling shutters. These automated window coverings lock into position when closed. Accordion rolling shutters with their interlocking slats are another popular security choice.

5. Improve Insulation With Exterior Shutters

To have a comfortable home interior, it is important to maximize heat gain during the colder months, while keeping it to a minimum in summer. Exterior shutters are highly efficient in this regard. Wood shutters, or other ranges with operable louvers, offer versatility. Shading is controlled and adjusted according to your preferences and needs. Bahama shutters will refresh you with a cool ocean breeze...

6. Update UV Protection With Exterior Shutters

Functional shutters allow you to limit sun damage to your furniture and furnishings. This constitutes a major saving over time. You will also be spared many a wrinkle, as you will no longer be squinting as a result of glare!

7. Learn About Light Filtering With Exterior Shutters

With exterior shutters in place, you are able to turn your bedroom into a dark, shady, sleep inducing haven in the middle of a bright summer day. Or how about creating the perfect atmosphere for a popcorn-and-movie session on the living room couch? Whether these are benefits, may become debatable!

8. Protect Your Privacy With Exterior Shutters

If inquisitive neighbors or prowlers are a headache, exterior shutters again come to the rescue. They offer complete privacy when and where you need it.

9. No Noise Niggles With Exterior Shutters

One of the many benefits of an exterior shutter is its noise damping effect. Almost all the shutter styles have this quality. Aluminum rolling shutters are especially effective in this regard, due to the double-walled construction, with its unique foam filling. Shutters with a honeycomb structure are also known for this attribute.

Home improvement projects often focus on bathroom and kitchen remodeling, but exterior shutters seem to deserve a spot on the revamp roster!

Awnings-and-Blinds.com - Read the free Sunbrella Awning article at Awnings-and-Blinds.com - also by Rika Susan of Article-Alert.com. Copyright of this article: 2006 Rika Susan. This article may be reprinted if the resource box and hyperlinks are left intact.

Article Source: http://EzineArticles.com/?expert=Rika_Susan

Wednesday, July 26, 2006

Home Improvement Catalogs

Due to the fast-paced life that people live nowadays, more and more individuals are turning their homes into sanctuaries of serenity with improvements. Home improvement, which used to be dominated by general contractors, is now being completed by homeowners themselves.

The proliferation of do-it-yourself home improvements may be a result of the cheaper costs (which eliminate contractors’ fees), working within the given budget, and also the proper execution of the homeowners’ home improvement ideas. Although improving one’s home without the help of professionals may seem to be an incredulous task, a lot of homeowners are taking the risk of remodeling their own homes by using relevant information that can be obtained through home improvement catalogs.

Home improvement catalogs offer a lot of valuable information regarding projects in the home. Pertinent information on simple home improvement projects such as painting walls, tiling, and minor carpentry work, among others are made available through these catalogs. Home improvement catalogs also present these home improvement ideas in ways that can be easily understood and followed by amateur home improvers. The materials and the tools for these projects found in home improvement magazines are also widely available from hardware stores, home improvement stores and warehouses, and even construction specialty stores. Also, these home improvement magazines are frequently supported online; homeowners can visit the websites anytime if they have any questions or need clarification regarding the steps involved in the projects that they are working on. People rely on home improvement catalogs not just to show them how things are done; they also include creative ideas that are appealing, attainable, and workable. They also offer valuable tips on cost-effective remodeling, remodeling time management, and remodeling basics.

Home improvement magazines are actually a compilation of remodeling ideas from experts in the field. Credible and reliable sources all work together to come up with an effective home improvement magazine. These sources include general contractors and builders; specialized workers such as plumbers, electricians, and masons, even artists and craftsmen; interior decorators; engineers and architects; and landscape contractors all share their expertise regarding their specific areas for these magazines.

Home Improvement provides detailed information on Home Improvement, Home Improvement Loans, Home Improvement Catalogs, Home Improvement Remodeling and more. Home Improvement is affiliated with Mobile Home Remodeling.

Article Source: http://EzineArticles.com/?expert=Alison_Cole

What Is Dry Powder Carpet Cleaning?

You have many options when looking for a carpet cleaning method to use in your home. One of the options that is relatively new is the dry powder carpet cleaning method. It is a popular method but most people have no idea how it works or even if it works. This article will try to explain the process and the positive and negative characteristics of it.

In this process of carpet cleaning, a semi moist power is spread onto the carpeting. The powder which is soaked in a detergent and/or solvent solution is usually either a corn cob based organic powder or a fully synthetic powder. This powder is agitated and worked into the carpet with either an orbital floor machine with a round plastic bristle brush or a machine with counter rotating plastic brushes. The theory behind this method is that the powder acts like thousands of little sponges scrubbing and absorbing dirt from the carpet as it is agitated. After the powder dries, in only a few minutes, the carpet is vacuumed to remove the sponges and the floor is ready to be used.

The biggest positive characteristic of this method of cleaning is that it dries extremely quickly. Its drying time can be measured in minutes instead of hours. This means that you do not have to struggle to keep your kids and pets off of the carpet until it dries. You can put your home back to normal use almost immediately. Another benefit is that since the carpet is not being soaked with water, this method does not force spots down only for them to return hours or days later. What you see is what you get.
Dry powder cleaning does have some negative characteristics as well. For starters, the powder is usually not completely removed. The powder does not harm your carpet but the dry powder granules can stick to bare feet and can be a little bit of a nuisance. It is also not as aggressive as some other carpet cleaning methods. It is therefore best used on light to medium soil conditions.

That is pretty much all there is to this method. Hopefully this article has given you enough information to decide whether or not this it is for you.

The author of this article, James C operates a carpet cleaning resource website. Find cleaners offering Houston carpet cleaning, Colorado Springs carpet cleaning and cleaning in your town.

Article Source: http://EzineArticles.com/?expert=James_C

Monday, July 24, 2006

How to Get More Space in the Garage

It doesn't seem to matter how big your garage is: you can always fill it up with stuff. Sure, you can hire some professional organizer to come help you clear a path to the car doors, but that costs money. How about I just give you some tips instead? You don't even need to pay me $100 an hour, or whatever it is de-clutter-ganizers are making these days. So, without further ado, here are five ways to clear up space in the garage:


1. Hang things from the ceiling.

Garages usually have plenty of headroom, so that leaves many cubic feet of space you can exploit. Is your family full of sports fanatics? You can buy ceiling-mounted racks designed specifically for outdoor recreational equipment, everything from snowboards and bicycles to canoes and kayaks. You can also get platforms that go up and down with a crank of a lever. These allow you to tuck hundreds of pounds of junk--er, valuable family heirlooms--up amongst the rafters.

2. Make use of wall space.

You've probably got at least one pegboard in the tool area of your garage, but there's no reason to limit yourself. You can attach your own homemade brackets, nails, and pegboards, or you can buy special panels designed to support hooks, baskets, and shelves.

3. Cabinets are for garages too.

Most garages have enough room on the sides or in the back to accommodate banks of cabinets, while still leaving enough space to get in and out of the car. Even if there's only enough room for 12" deep cabinets, that's still a lot of extra storage if you run them from floor to ceiling. Also, cabinets look nice--all your clutter gets hidden behind the doors, where you don't have to look at it every time you drive inside.

4. If you have too many vehicles, try a car lift.

You've got a good 10-12 feet of height in your garage, right? And the average car is less than five feet high, right? Well, there are systems out there that let you stack them. Granted, these are pricey, and raising and lowering the top car can be a hassle if the vehicle is driven every day, but if there's a car you don't drive that often but that takes up space, it might be something to look into. Car lifts can make a lot of sense in houses with one-car garages.

5. Think garage sale.

If you've tried your hardest to find storage space for everything, but you're still tripping over stuff, it may be time to clean the garage out. Chances are you have toys, boxes, tools, etc. that you bought many moons ago (and which your family probably hasn't used in almost as many moons) that you don't need to keep around. So, clean it out and throw it out, or better yet, have a garage sale. At least then you make some money and are rewarded for your efforts.

TC Thorn is a writer, blogger, and webmaster who specializes in the home improvement sector.

For more information on the subject visit the Garages area of the author's Home Improvement blog.

Article Source: http://EzineArticles.com/?expert=TC_Thorn

What You Need To Know When Choosing An Exterior Door

Exterior doors for your home come in a variety of materials, colors, and designs. New materials, such as vinyl have provided manufacturers with the ability to create exterior doors that need little maintenance, provide security, energy efficiency and add value to your home.

The front door of a home greats your guests and its styling says a lot about the home owner.

Wood

Wood exterior doors are desirable for their natural beauty and structural strength. They are widely available in a number of different woods ranging from pine, oak, cedar, mahogany, and walnut. They do however require significant protection from the elements as well as regular maintenance. Manufacturers are required to treat wood with a preservative to help prevent rotting but ongoing maintenance is the only way to ensure that your wood exterior door lasts and performs.

Steel

Steel exterior doors are actually made from a combination of materials. The interior structural components (rails and stiles) are often wood, the inner core is filed with insulating foam and the outer skin is made of galvanized steel. The inner wood structure gives it stability and strength. The foam core provides good insulation and the steel skins are durable, resistant to warping or rotting and require little maintenance.

Steel exterior doors can be painted any number of colors. They are also available with pre-finished PVC coatings that simulate a wood-grain finish.

Fiberglass

Fiberglass exterior doors are relatively new and are constructed in the same fashion as steel exterior doors with wood stiles and rails and an inner core of injected foam. The outer skin is fiberglass. Fiberglass is very strong, durable and energy efficient. In addition to a flat painted surface, fiberglass can also be embossed to give it the texture and appearance of wood.

Vinyl

Vinyl exterior doors are also relatively new. They employ a multi-chambered vinyl structure for both the frames and panels (sashes) utilizing a steel, aluminum, or wood re-enforcement to add strength and prevent distortion. Vinyl doors are good thermal insulators because of their multi-chambered designs and offer good thermal performance ratings. Vinyl is a very durable material and is resistant to extreme weather conditions. It is also very resistant to breakage and provides good protection against forced entry through the door. Vinyl doors will not rust, dent or scratch, and require no special maintenance.

For additional information on exterior doors for your home or other renovation projects, visit Renovation Headquarters.

Article Source: http://EzineArticles.com/?expert=Bill_Prudehome

Friday, July 21, 2006

Know About Roofing

All homes are built with a few common essentials. Walls, doors, windows, and beams are a few components that are common to all, whether a small cottage or a high-rise skyscraper. The roof of a house is one of the most important aspects of any construction. Selecting the right roofing option in accordance with the climatic conditions can go a long way in providing an long-lasting and beautiful home.

Since the roof is one of the most important external elements of a house, it should not only be durable, but also have an aesthetic appeal. There are several different roofing options available today. Although asbestos is a cheap and popular material, it is fast being replaced by tiled and metal roofing. These alternatives prove to be long lasting and also tend to reflect direct heat to a greater extent as compared to asbestos. Apart from different roofing materials, the homeowner can also use a variety of external paints to coat the roof. These paints not only add color to the roof, but also provide insulation from extreme heat and are resistant to mildew and algae.

To maintain longevity of the roof, the homeowner must undertake regular repairs and maintenance. This is important as the roof takes a lot of damage from the elements of nature, compared to any other part of the house. This tends to necessitate routine “wear and tear” roof repairs. Care should be taken to ensure that no trees are growing in close proximity as falling branches may damage the roofing.

The roof may also develop black streaks, which is an indication of a mold, algae or fungus growth. These conditions are common in areas of high humidity and may lead to the weakening of the roof structure and leakage problems.

The homeowner may undertake minor roof repairs. However, it is advisable to consult a specialist in case of major repairs. A good roof is a crucial component of a well designed home. Maintaining a house maybe difficult, but by utilizing the right roofing materials, one can minimize future problems.

Roofing provides detailed information on Roofing, Metal Roofing, Roofing Contractor, Roofing Material and more. Roofing is affiliated with Asphalt Shingles.

Article Source: http://EzineArticles.com/?expert=Josh_Riverside

Successful Real Estate Sale Technique: 7 Must Do Bathroom Updates

Real estate agents will tell you bathrooms can make or break the sale of your house. Prospective buyers will look at your bathroom as though they were in a public restroom if it’s not clean, functional, and stylish. What you want is the buyer to feel as if they are entering their own home, not a messy public restroom.

I can’t tell you how many times I’ve gone to a public restroom and turned around and left without using it. Or how unsafe I felt when I did use it after I’ve stepped over paper hand towels and other debris on the floor of a public stall. Or I’ve gotten to the sink and half the faucets didn’t work and pink goop was beneath the soap dispenser. You get the picture.

Here are the absolute, 7 Must Do Bathroom Updates:

1. Probably the most important thing you can do before any updates take place is to scrub the bathroom as if your health depended on it. Use an old toothbrush to clean tile grout, cracks and crevices and around fixtures. That’s what your prospective buyers expect--squeaky clean.

2. If there is a theme wallpaper, remove it. You don’t want to limit your prospects to only those who may have your taste. Paint in a neutral tone and rely on accessories that can be removed for added color.

3. If there is no wallpaper and cleaning the walls can not restore them to a satisfactory finish, by all means, paint them. Ditto on the neutral paint.

4. Check all faucets, spigots, shower head, and under sink pipes for leaks.

5. Change faucet washers, if needed, if the fixtures are still in good shape and are not outdated.

6. If faucets and spigots are showing wear or dated, change them.

7. Change shower head and upgrade to something more stylish, such as a rain shower head or a multi-spray nozzle, depending on the value of your home.

The bathroom is the one room used by family, friends, neighbors, and the occasional stranger. People want new bathrooms even in old houses. So, whether your house is modern or vintage, cleanliness can give the appearance of new. Don’t discount this. Good hygiene, is at the top of the list of a bathroom’s first impression.

The bathroom is also the room that buyers least want to invest in renovating when they’re looking for a new home.

So, follow these suggestions about bathroom updates and you are not only likely to sell your house, but you are more likely to get a full-price offer.

Connie LeGendre has successfully bought and sold residential real estate as a homeowner and investor for over fifteen years. As an architectural designer, she has renovated properties for herself and clients. If you found this article interesting, you may want to check out: http://www.interiordesignclinic.com to get a FREE copy of "7 New Secrets to Unleash the Designer in You," and http://www.interiordesignclinic.com/bathrooms

Feel free to copy and distribute this article only if it is copied in its entirety, including the biography.

Article Source: http://EzineArticles.com/?expert=Connie_LeGendre

Wednesday, July 19, 2006

Passive Solar Problems – Too Much Heat

Solar energy presents one of the cleanest renewable energy platforms we have available to us. Sometimes, however, it works to well and can turn your house into a scorcher.

Although you probably do not realize it, your home is heated using passive solar as the energy source. No, we are not talking about solar panels here. Instead, passive solar simply refers to the heat produced when sunlight inherently enters you home through windows and starts to produce heat by warming up floors, furniture, carpets and so on. In some instances, savvy people intentionally orient their house to take advantage of passive solar, but most people don’t have a clue it is happening.

The sun is extremely powerful. Obviously, it is the basis of all life on our planet. Most people don’t realize how much energy is contained in sunlight. For example, how many times have you left a vehicle in a parking lot only to come back and find it blazing hot inside? This is passive solar at its finite best. The sunlight penetrates through the windows and heats up the interior of the vehicle. Now you understand passive solar and, ironically, one of the potential problems with it.

When it comes to passive solar heating in a home, it can work to well. Regardless of whether you are intentionally or unintentionally pursuing passive solar, you know how hot a home can get. During the summer, it can be downright brutal. There are, however, simple steps you can take to mitigate this problem.

The first problem has to do with intrusion. Simply put, too much sun is penetrating into your home. You already know the answer from a common sense perspective – shading. In this case, you need to pull the shades over windows on the south facing side of the house. In the northern hemisphere, the south side of your home will always get the most sun. If you don’t want to put shades up, close the door to the room in question to cut off the heat circulation. You can open it later in the evening when things start getting cool and you could use a bit of heat.

If you are intentionally designing for passive solar, there is a landscaping trick you can do to maximize passive solar production in winter, but limit it in summer. In this case, we are talking about trees. Specifically, you should plant trees that grow a heavy leaf canopy in the summer, but lose all their leaves in the winter. Put in front of large windows, these trees will act as a natural temperature regulator for your passive solar system.

Ultimately, the key to beating too much heat in your house during the summer is to simply understand where it is coming from. If you can block the ingress of the sunlight, you can cut the heat to manageable levels.

Rick Chapo is with SolarCompanies.com, a directory of solar energy companies.

Article Source: http://EzineArticles.com/?expert=Richard_Chapo

Window Cleaning Tips - How to Have the Cleanest Windows in the Neighborhood

Nothing looks worse than a dirty window on a beautiful summer day. Use these easy techniques for spotfree, shiny windows.

Tools:
Soft, linkfree cotton cloths - old cotton t-shirts or diapers
Sponge/squeegee combination with a long handle if you have hard to reach windows
Bucket filled with lukewarm water, 3 tbsp. ammonia and a squirt of liquid dish soap
Toothpaste, for scratches
Q-tips
Plastic scrubber

Clean windows in the morning if the weather is hot. This prevents streaking caused by the washing solution drying too rapidly.

Work on one window at a time. Thoroughly scrub the window with the sponge side of the squeegee. If there is crud stuck to the window, use the plastic scrubber to gently remove it. Clean the corners with Q-tips.

Dry a strip at the top of the window with the cotton cloth. Pull the squeegee straight down, starting in the dry strip. Wipe the blade before moving to the next section. Mop up the bottom of the window and the sill with the cotton cloth.

Polish out any scratches with a little bit of toothpaste on a piece of clean cloth.

Repeat with the rest of the windows.

Follow these simple instructions and you will have clean windows you can be proud of.

Pat Schraier has a website http://www.cleaning-your-house.com which features information on organizing and cleaning your home. Sign up for the newsletter and receive a free House Cleaning Checklist.

Article Source: http://EzineArticles.com/?expert=Pat_Schraier

Tuesday, July 18, 2006

Bathroom Tile Ideas

Bathroom tile ideas for bathroom floor tile can help you know what options to consider for your bathroom. Bathroom tile comes in a variety of shapes, sizes, patterns and textures and they are the basis for any bathroom design. Bathroom tile ideas can help you have the very best bathroom possible.

Ceramic bathroom floor tile is often used because of its durability, resistance to dampness, its safety to walk on when wet and its ease of cleaning. If you select ceramic tiles for your bathroom, consider using a tile that has a slip-resistant surface for bathroom safety, which is one of the best bathroom tile ideas. If you buy and install unglazed tiles, they will need to be washed frequently because they absorb stains quite easily. Bathroom floor tile shapes can be squares, rectangles, hexagons and octagons while accent pieces can be narrow and small diamond-shaped.

Here are bathroom tile ideas for bathroom floor tile:

1 - If you use solid color ceramic bathroom floor tile in your bathroom, you can add tile borders of a different color to the tile floor, or you can create a border by alternating different colors. This kind of visual treatment can create a more interesting bathroom floor.

2 - When using the same color ceramic tile for the floors and walls, choose a different tile size for the walls or lay the wall tiles diagonally to create a more interesting visual effect.

3 - Another of the bathroom tile ideas is to choose a grout color that contrasts with the ceramic tile color. For example, if you are using white tiles, you could use blue, red or yellow grout for contrast. Be sure and apply sealers to grout lines in areas of heavy wear since sealers will protect and preserve grout colors.

4 - If your favorite color for a bathroom is pink, for example, add a few pink decorative tiles for the walls or use shapes, textures and borders to give it some visual interest. Select some rows of the walls where you can also use some of the pink tiles placed diagonally.

5 - To give your bathroom a contemporary style and look, consider using bright and bold colors with shapes or graphics against plain backgrounds. Contemporary style accessories and fixtures will further provide a modern-looking bathroom.

6 - If you are trying to have a romantic or Victorian look in your bathroom, use floral tiles in soft colors like pink, light green or light blue plus handpainted ceramic sinks and perhaps a wooden floor.

7 - For a Mediterranean bathroom look, mix terra-cotta tiles with Mexican or other hand-painted tiles for the floors. For the countertop perhaps mix the hand-painted tiles with another plain color tile.

Bathroom tile ideas and tile color are important since color can greatly affect your mood -- making you feel calm or energizing you. Warm colors like peach and yellow are fun, they make the bathroom feel cozier and they go well with a more country looking bathroom decor. If you use neutral colors like beiges or whites, they will make the room look larger, they will reflect light and they are always in style. Colors like blue, green and violet are viewed as serene or cool colors. Brighter colors like black or red add drama to the decor, absorb light and will make the room appear smaller. In rooms with plenty of windows and natural lighting, consider using darker tiles to offset the ambient lighting. You can also work in colors you want through the use of accent tiles and accessories.

Have fun as you select the styles, colors, patterns and sizes of bathroom floor tile and related details for your bathroom. You'll want your bathroom to be a fun, cozy room to spend time in and the bathroom floor tile used can help create that kind of atmosphere. Use bathroom tile ideas to help you have that special bathroom that you can enjoy every day.

Copyright 2006 InfoSearch Publishing

Learn bathroom decor ideas and bathroom layout, lighting, storage, bathroom vanities, small bathrooms, childrens bathrooms and more. David Buster is VP of InfoSearch Publishing and webmaster of http://www.yourdreamloghome.com - a popular website for homeowners.

Article Source: http://EzineArticles.com/?expert=David_Buster

Bathroom Remodeling and Bathroom Accessories

The bathroom is the most used room in your house and it's the one room that all your guests will get to see when they come to visit. If you're about to start on a bathroom remodeling project then you know that it's important to get nicely styled fixtures, elegant tiling, warm flooring and soothing lighting but don't forget the bathroom accessories.

Bathroom accessories are what set the room off and allow you to add that personal touch of style to your bathroom. They are also the most easily forgotten things when you are planning to rip out the fixtures and rearrange things to install new stuff because they don't seem to be important enough. It's easy to put off decisions about the bathroom accessories because you'll have plenty of time to sort them out later right?

There are some very good reasons why you should put the bathroom accessories high on your list right from the start of the project:

Choose bathroom accessories that match the fixtures

When you are looking for the larger fixed items for your bathroom redesign you should be looking for matching accessories at the same time. It might take you some time to find the right bathroom accessories so it's important to keep an eye out when you're shopping. Here are some bathroom accessory tips on what you should be looking for http://www.bathroomsremodeling.this-info.com/bathroom-accessory.php

If you do see something that you like, make a note of it straight away. You need to write down what you saw, where you saw it, how much it cost and what items it might go with nicely in your new bathroom. Making notes is important because if your memory is anything like mine you won't remember what you saw or where it was when it comes to making decisions.

Make sure that the right bathroom accessories are available

When you make your purchasing decisions for the big stuff make sure that the accessories that you want to go with them are available at the same time. You might decide that you want accessories that are made specially to go with the main fixtures you've chosen. You don't want to be disappointed to find that the bathroom accessories are not available for some reason when you come to purchase them. Also if you leave it too long before buying them they might go obsolete in the meantime. Manufacturers have a habit of changing their designs regularly and often drop old lines.

Make sure you do get some bathroom accessories

If you don't buy the accessories at the time you buy the fixtures there is a chance that you never will buy them. You can just put off that chore because you can do it anytime. Well anytime is now so don't put it off.

Steve writes for http://www.bathroomsremodeling.this-info.com Try this Bathroom Remodeling Idea

Article Source: http://EzineArticles.com/?expert=Steve_Gee

Monday, July 17, 2006

Three Great Concepts for Remodeling a Master Bedroom

Since it’s one of the places people spend the most time, one of the most satisfying home makeovers is the main bedroom. Here are three ideas for creating a dynamic new main bedroom space:

The Passion Boudoir

The French have always led the world in designing sexy bedrooms, and now homemakers all over the world have followed their lead and begun decorating their bedrooms for sex and sensuality.

Use emotionally appealing colors that will enhance your beauty and sensuousness. Be daring; use bold colors. Examples of seductive colors are rouge or lipstick reds, creamy peaches, and subtle pink tones.

Prints such as animals or florals can suggest exotic locales, and mirrors placed in unusual places can reflect seductive candlelight. Tropic plants add mystery, and dressing tables filled with feminine accessories and intimate objects create a romantic mood.

The Reading Room

For many people, the bedroom is a place to lounge and read a good book. If you're one of those people, you'll want to create a space that will enhance your reading pleasure. For instance, adding padded headboards will make it easy to maintain proper posture while reading.

When painting your reading room, choose soft colors that reflect light without glare and also support peaceful feelings. Good colors choices would be old world ivory, antique amber, sage green, or slate blue.

Soft, pliable pillows, luxurious Afghans or throws, paintings featuring wide-ranging vistas, and mirrors will promote private reflection and add feelings of indulgence. A comfortable lounge chair with a floor lamp and tea table also work great in a reading room.

Be sure to provide enough light for reading, which can be done without having to flood the room with harsh reading lights. You can enhance the overall light by placing softer lighting throughout the room.

The Private Sanctuary

This type of bedroom, designed to create a place where you retreat from the world and unwind, provides total privacy. Display photos of friends, family, and places you love. Also display meaningful mementos and souvenirs to remind you of happy times, but don't go overboard and clutter your calming serenity. Exchanging these personal keepsakes often with ones in storage helps counter the clutter and gives added significance when next viewed.

Colors that work well in private sanctuaries include navy or cobalt blues, deep chocolates, and forest greens. Darker colors create a womb or cave like feeling and aid deep sleep.

A writing desk, small refrigerator, and television all contribute to the feeling of being able to shut out the world and luxuriate in your own private space, without interruption.

You spend a great deal of time in your bedroom, so no matter what type of feeling you're trying to create, remodeling your main bedroom to reflect your lifestyle is one of the best projects to undertake.

Copyright c. 2004 by Jeanette J. Fisher. All rights reserved.

Professor Jeanette Fisher, author of Doghouse to Dollhouse for Dollars, Joy to the Home, and other books teaches Real Estate Investing and Design Psychology. For more articles, tips, reports, newsletters, and sales flyer template, see http://www.doghousetodollhousefordollars.com/pages/5/index.htm

Article Source: http://EzineArticles.com/?expert=Jeanette_Joy_Fisher

Swimming Pool Filters

Basic Guide To Swimming Pool Filters

One item that every swimming pool must have is a pool filter. A swimming pool filter is the main process that keeps your swimming pool clean of the various debris that are brought in by wind, rain, cleaning supplies, toys, and swimmers. A pool filter works to keep the water clear and promotes safety and health while in the water. The pool filter has three main components that allow it to keep your water clear and safe for swimmers. First, there is a motor and pump that work to bring the water in and push it out during filtration. Then the filter itself falls into three categories DE (Diatomaceous Earth), cartridge and sand.

A DE (Diatomaceous Earth) filter is probably the best for filtering even the minutest particles that could be in the water. Diatomaceous Earth is a natural substance that is found in the soil. It has the consistency of a fine, white powder. A filter made of Diatomaceous Earth comes in two different types of filters, a spin filter and a vertical grid filter. These two terms simply signify how the filter is set up. The spin filter does not work as well as the vertical and is virtually obsolete today.

A sand filter makes use of sand to filter the water of particles and allows filtered water to run through easily. The cartridge filter works in the same manner as a Diatomaceous Earth filter but without the use of any substance other than fabric mesh to filter the water.

Here are a few things you should consider before purchasing a swimming pool filter:

First, find the volume of the entire swimming pool. To find the volume you must consider the shape of your pool:

If your pool is rectangular – Multiply the following – Length, width, average depth If your pool is circular – Multiply the following– Radius, 3.14, average depth

Next, figure the capacity of your pool. This will allow you to calculate how much water your swimming pool holds. This is an important factor in purchasing a pool filter. To find the capacity, multiply the volume (you found in step one) by 7.48.

You will then have to determine the type of filter you want. Consider if your pool would benefit from a cartridge, DE, or sand filter. You should also consider if you want the filter to be vacuum or pressure. It is suggested that you should make the filter slightly larger than your initial calculation to allow for better filtration.

There are a lot of different aspects that must be taken into consideration when purchasing a swimming pool filter. For the entire filtration system you can expect to pay anywhere from $20.00(USD) to $300.00 (USD). Replacement filters are slightly cheaper in some aspects, depending on the type of filter your system uses, you can expect to pay anywhere from $4.00 (USD) to $200.00 (USD).

It is important that you follow all recommended procedures outlined by the swimming pool manufacturer. This will help you in maintaining clear and healthy pool water that can be enjoyed by all swimmers.

David Evermon has been involved in many swimming pool construction and maintenance projects, David writes articles about Swimming Pool Filters For Zupatips.com

Article Source: http://EzineArticles.com/?expert=David_Evermon

Friday, July 14, 2006

What Is The Best Method For Residential Air Duct Cleaning?


How can you be sure you have hired the right air duct cleaning contractor? With primarily three different methods used to clean the air ducts in your home and prices ranging from $59 to $800, you want to be well informed before you start contacting air duct cleaning companies.

So why the huge disparity in prices? The answer lies somewhere between homeowner preferences and business marketing practices. For example, someone who is a very clean person that has just purchased an old home from a party that had several pets, may not care about the price. On the other hand, someone that just wants to get their ductwork cleaned because their neighbor just had it done, might only want to pay a minimal amount. Residential air duct cleaning companies know this and will base their marketing around it.

So what are the different methods? The most common are:

* Rotary vacuum brushing, with camera
* Rotary vacuum brushing
* High-pressure air washing

Rotary vacuum brushing
If you or someone in your home suffers from severe allergies, you might want the re-assurance which using the camera can give you. You will know for certain that all dust, debris and grime have been removed. But be prepared to pay a price! This method is very time consuming so the technicians will not be able to see as many customers per day. Typically, these folks will come out and give you a bid. You might want to consider at what point it is better to just replace the old air ducts with new!

High-pressure air washing
The air-wash method is very quick and very affordable. But will it be effective enough in removing caked-on grime? Most likely not. What if you have a newer home with new duct work which still has factory-processing oils inside it? Conversely, if you just had your air ducts cleaned last year, it might not be necessary to have such a thorough job done this time.

These are questions only you can answer. If you are an extremely tidy person (have you been called a neat freak before?) you might be most comfortable with the camera method. Or, if the ductwork was recently cleaned, you may prefer the high-pressure air-wash method.

Most people are somewhere in between. If the company you hire is reputable and you can trust the duct cleaner to do a good job, you might want to consider using the brush cleaning method (minus the camera) first. Later, once all air ducts have been brushed, you can switch to the lower cost air-wash method.

Certainly, brushing with or without a camera, or simply using the high-pressure air-wash method is better and healthier for you and your family than doing nothing at all. Either way, you will have peace of mind, knowing that decaying pet and rodent hair and excrement will not be blowing around your house. As one company says; 'If it's in the air, it will soon be in your lungs'.

David Trosdahl is a successful Webmaster and publisher of CleanMyFurnace.com. He provides more information on air duct cleaning and answers even more questions on his FAQ page.

Article Source: http://EzineArticles.com/?expert=David_Trosdahl

How to Care for Leather Furnishings


Leather furnishing can be beautiful in a home. There is a lot of style in using leather in your home décor. Leather can be masculine, classic, and screams quality to most. Leather can be very costly, and that’s why you buy it with the idea in mind to keep it for many years. With proper cleaning and care this can be done.

When caring for leather, never expose the leather to liquid or high humidity. This can cause the leather to discolor or damage the dye. Don’t allow your leather furniture to sit in the sun, because it can cause fading. Clean your furniture every six months. Using saddle soap or a water based leather cleaner. These cleaners will help remove dirt and stains.

Most leather can be cleaned using mild water based cleaners, except suede. Try testing a small area that can not be seen to see if the cleaner will damage the furniture. Be gentle when cleaning your furniture. You have paid a lot of money and it should be taken care of.

To clean suede, use a cleaning cloth. This cloth has a tacky feeling to it and you can get it from most leather cleaning suppliers. The cloth will scrape the soil from the furniture and remove dark and shiny spots. Make sure that the cloth you use is the same color as the furniture you are using it on. Also add a light coat of aerosol suede protector after you finish cleaning the furniture.

If you take care of your furniture carefully and regularly, it will remain looking like new for years and years to come.

Jakob Culver is founder of the website – http://homedecorhelponline.com and has a solid background in home decorating.

To find out more information about this topic or home decorating visit http://homedecorhelponline.com

Article Source: http://EzineArticles.com/?expert=Jakob_Culver

Carpet Cleaning - Helpful Hints


Vacuuming your carpet can help pick up little things and even keep your carpet looking fresh, but it just never seems to look as new as the day you got it. Getting your carpet cleaned can take out the everyday beating your carpet takes just from merely walking on it. There are many things to take into consideration when you are going to choose a carpet cleaning professional. You want someone who will be safe and fast, and someone who will not disrupt your everyday life. You also want someone who will get the job done right.

Ask for references when looking into a carpet cleaning contractor. You could even ask friends and family who they go through or see if they know anyone personally to see about getting a deal. Try not to hire someone who is going door to door, because it could be a scam. Going with a bigger more well known company would be a better choice. You know that they have all the modern technology and equipment and will do a beautiful job because their business relies on it.

Never get a quote over the phone. Have someone come to your house to give you a free quote. Because they can’t tell how big your carpet area is or how much your carpet will need to be cleaned they can not give you an accurate quote over the phone. They will also need to see how much time they will need to spend on your home.

Get a few estimates and then go with who would best suit your needs. Make sure that the employees are properly trained, and see what basics are covered when they quote you. Ask what you should do before and after the cleaning also. Always be careful who you are letting into your home.

To find additional information like this or about home decorating visit - http://homedecorhelponline.com

http://homedecorhelponline.com was founded by Jakob Culver. Jakob has a background and large knowledge in and about home decorating.

Article Source: http://EzineArticles.com/?expert=Jakob_Culver

Thursday, July 13, 2006

Installing a Brick or Paver Walkway


The use of Bricks or Pavers to create a walkway or patio complements a home in a way that is unmatched. It adds a level of quality and elegance to a home entrance that can not be achieved with either concrete or asphalt. Brick and Pavers also come in many different colors and shapes allowing for unique color schemes and patterns to be achieved. In addition, installing a Brick or Paver walkway does not necessarily require a pro. With some basic knowledge and a relatively simple walkway plan, a homeowner is capable of undertaking such a project.

The key to installing a Brick or Paver Walkway is to first properly prepare the area where the bricks/pavers are to be installed. The area should be dug out at least a foot down, removing all topsoil and clay soil. In addition, string lines should be strung on each side of the walkway. The string lines indicate the finished height of the walkway.

Once the area has been dug down, 3/4" gravel stone should be laid in and tamped down tightly. Then 2” of sand, or stone dust should be spread over the gravel. Again the sand/stone dust should be tamped down. Stone dust is preferred. The height between the tamped down sand and the stringline should equal the thickness of the brick or paver.

Now that you have a stable base, place a 1" pipe or ledger board the length of the walkway on either side of the walkway. Then using a flatedge, e.g. a 2"x4" board, slide it over the two lengths of the pipe/ledger board. In doing this you will create a level surface area to lay the bricks/pavers.

Now place on the level sand/stone dust strips of plastic brick borders. Install a run on both sides of the prepared area. These strips will act as your walkway border and help to maintain the integrity and shape of the walkway. You can get these plastic strip borders at most home improvement stores. The strips should be anchored down with 12" galvinized nails. You should sink these nails into the ground and through the strips every foot.

Once this is done, you can then begin to lay the bricks/pavers. There are many patterns you can lay. I particularly like the Herring Bone pattern. The key to laying the bricks/pavers is to ensure that they interlock with each other. Always stagger adjacent rows of bricks by 1/2 of a brick to interlock them. This will again help maintain the integrity of the walkway.

Inevitably bricks/pavers will need to be cut or split when building the walkway. Unless you want to buy or rent an expensive wetsaw, I would suggest purchasing a simple brick/paver splitter. It is basically a chisel with a wide end that is the width of the bricks/pavers. To actually cut/split the brick/paver, lay it in a bed of sand and place the chisel at a 75 degree angle over the spot where you want to break the brick. Then using a hammer strike the butt end of the chisel firmly. You may need to do this a couple of times. You may also want to flip the brick/paver over and strike the other side of the brick using the hammer and chisle. Within one or two strikes the brick/paver should break cleanly. If your walkway has curves you will need to buy/rent a wetsaw.

After installing the bricks, build up the outside edges with additional sand, and then shovel in the topsoil and pack down firmly.

Finally, spread stone dust over the new walkway and sweep into the cracks. Repeat this process a couple of times to ensure the cracks are fully filled. This will complete the interlocking of the bricks and help to eliminate any weed growth. Just add grass seed to the outside edges and you should have a beautiful entrance to your home within a couple of weeks.

Mark J. Donovan

me_Donovan@comcast.net

http://www.homeadditionplus.com

http://www.homeaddition.blogspot.com

Over the past 20+ years I have been involved with building homes and additions to homes. I have completed many projects that have included: building a vacation home, family room additions, and a garage. I have also finished the upstairs on unfinished homes. My formal education and profession has been as an Electrical Engineer and Marketing Manager.

Article Source: http://EzineArticles.com/?expert=Mark_Donovan

A Guide To Setting Up Your Home Office


Starting your home business can be fun and exciting, but it is important to make sure that you have the essentials. The most important thing you will need for your home business is a home office.

Working at home is a luxury of having your own business. Thanks to the internet this is something that is becoming more and more popular.

Creating a home office is a great idea. It gives the sense of being at work without ever leaving your home. Remember this is the place where you will be earning your money. It is always a possibility that your clients could stop by your office.

You want a space in your home that is comfortable and quiet. You will also want your privacy when working as well and when you start your home office you should have these needs in mind.

If you have a spare bedroom that is ideal to use for a home office. You want a space that is closed off from the common noise of the house. If possible have the room that is farthest from the rest of the rooms of the house to use for your home office.

Furnishing your office can be the easiest or hardest part, deciding on what you feel you need in your office. You should have a desk, shelves and a filing cabinet at the very least. After you have the basics you can look into maybe putting a chair or small couch in your office just for comfort.

You will obviously need a computer and internet connection. You may also want to think about getting a separate phone line set up with voice mail, and a printer.

Add some pictures and cheery curtains. Working from home should be enjoyable, and you should enjoy the space you are working from.

To find additional information like this or about home decorating visit - http://homedecorhelponline.com

http://homedecorhelponline.com was founded Jakob Culver. Jakob has a background and large knowledge in and about home decorating.

Article Source: http://EzineArticles.com/?expert=Jakob_Culver

Wednesday, July 12, 2006

Five Easy Steps to Installing a Toilet

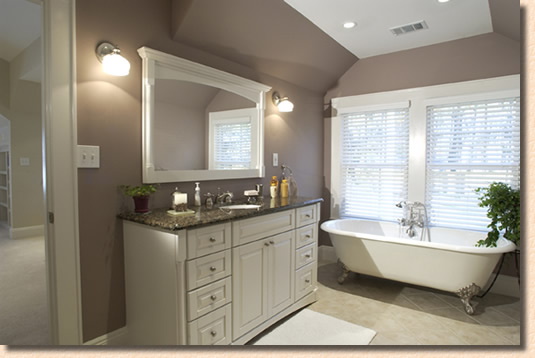
Besides matching colors and style with the rest of you bathroom or powder room, you will want to consider a few more points.

(1) Roughing in specifications: This is the measurement from the wall to the center of the outlet. Typically they come in 10", 12" and 14" sizes. The standard is 12" but a measurement should be taken.

(2) Foot print of the toilet: If you are dealing with a remodel over an existing floor covering, you may want to reference a specification sheet for the area that the bottom of the toilet will cover. For new construction or a new flooring choice, it is also a good idea to have a reference so the flooring is close enough to the ring on the toilet flange.

(3) Toilet height: ADA toilets are not just being marketed to people who need them. The new term is "Comfort Height." Taller people, older people and all other sorts are moving toward a taller toilet that you don’t have to go down as far to sit.

(4) Elongated/Round front: Elongated has a larger "target area" for the younger members of the family. Some drawbacks are that some people don’t like the looks and if the bathroom is smaller or even average size, the bowl may protrude to the point of being in the way.

Before you begin: observe all local plumbing and building codes. Carefully inspect the new toilet for damage. If the existing toilet does not have a supply shut-off value below the tank, install one before installing the new toilet.

Caution: risk of personal injury or product damage. Handle with care. Vitreous china can break or chip if the bolts and nuts are over tightened or if the product is handled carelessly.

Installation Instructions

Step 1: Remove the old toilet
Turn the water supply off. Flush the toilet, and sponge out any remaining water. Disconnect the water supply connection. Remove the old bolt caps, toilet, and T-bolts, and scrape off the old wax seal from the closet flange.

Insert new T-bolts. If installation of the new toilet is delayed, temporarily cover the closet flange hole with a rag.

Step 2: Install the new bowl
Record model number in Homeowner’s Guide. From the bottom of the bowl, firmly press a new wax seal around the bowl outlet. Remove the temporary rag (if used) from the closet flange.

Caution: risk of external leakage. Do not lift or rock the bowl after placement – if you break the watertight seal, you must install a new wax seal. Align and lower the bowl over the closet flange and T-bolts. Apply full body weight around the bowl rim to set the seal. Do not assemble metal washers and nuts on T-bolts at this time.

Please the bolt cap bases in the “up” position over each T-bolt. Secure the washer and nut to each T-bolt.

Caution: risk of product damage. When cutting off excess T-bolt length, protect the vitreous china surface from exposure to the saw blade.

If the T-bolts extend more than ¼” (6mm) over the nuts, cut off the excess. Snap the bolt caps onto each bolt cap base.

Step 3: Install the tank
With three tank bolts, pre-assembled through the gasket holes, position the tank on the bowl by centering the gasket on bowl inlet. Assemble the washers and nuts to the tank bolts. Tighten the three nuts so the tank is level. Be sure the nuts are tight enough to achieve a watertight seal.

Step 4: Connect the supply
Connect the supply shut-off valve to the toilet supply shank. Open the supply shut-off valve slowly and check for leaks. Install the toilet seat. Test flush the toilet several times. Periodically check for leaks for several days following installation.

Step 5: Adjustments
Adjust the tank water level to the marked water line by squeezing and sliding the C-clip on the float rod. To raise the water level, slide the C-clip up. To lower the water level, slide the C-clip down.

Installation Hints
The installation of a toilet is a very simple job and you need very few products in addition to what is in the box(s); but here are some things that should be replaced while in the area.

Wax ring: Inexpensive and a good idea to replace, even if you are taking the toilet off and putting it back on to the same flange. Note: The horned rings are easier to line up and help prevent leaks.

Toilet bolts: Also inexpensive; however you do not need to replace these unless you had to cut the old ones off. The brass does become corroded and hard to manage. Note: Give the plastic models a try. Plumbers give them great reviews.

Supply line: While you are working in the area, supply lines can vary from toilet to toilet and can become old and cracked. Replace, and save a possible headache down the road. Note: The braided lines work very well. They are flexible and add a neat look to the room.

Take a dry run at the installation. If the bowl and tank are not connected yet, set the bowl in place. Make sure the footprint covers the exposed area of the floor and it does not wobble excessively. When installing a two-piece toilet, after you have set the bowl down, set the tank on top to make sure you have proper clearance behind the bowl, and on all sides.

Note: Write the tank and bowl number on the underside of the tank lid for future reference.

If you are unsure of your workmanship and you think you might have some leaks, shut the water off after filling the tank. If there is a leak, you will only have one tank of water on the floor instead of an endless supply. When installing a two-piece toilet, you may connect the tank to the bowl prior to setting the toilet. When it is in two pieces, it is lighter and easier to move around. However, connecting the tank to the bowl is much easier when the bowl is not bolted to the floor. Remember to tighten the tank bolts evenly.

Make sure the bolt cap anchors are on BEFORE you put the nuts on the toilet bolts. If the caps do not fit on the anchor, or if the bolts seem to long, cut them off.

Lastly, if you are unsure of your workmanship and you think you might have some leaks, shut the water off after filling the tank. If there is a leak, you will only have one tank of water on the floor instead of the endless supply.

Employee Wholesale Direct is where you receive the full advantage of purchasing thousands of home remodeling products at true wholesale prices. Buy brand name discount faucets, discount sinks, discount toilets, and much more. EWDIR can be found online at http://www.ewdir.com

Article Source: http://EzineArticles.com/?expert=Kevin_Campbell
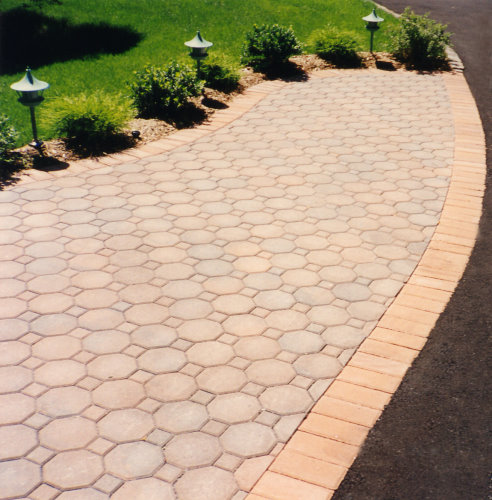
The Perfect Addition To Your Home: A Kitchen Island

The kitchen is the heart of the home and you want it to be a room that is welcoming and cozy for family and guests. But kitchens tend to be busy places and can get messy and cluttered up pretty quickly with all of the appliances and gadgets, not to mention décor items, which can diminish the nice atmospheric state you’re going for. One good solution is to install a kitchen island. Not only are they convenient as a means of additional workspace, but many are equipped with their own cabinets and drawers to help you prevent that untidy appearance.

Your first consideration when deciding on a which type of kitchen island you’d like should probably be how you plan to use it and their functions are as varied as the wide range of design options. They can be a utilized as a food preparation area, a baking center, a serving spot for an informal meal or buffet and the perfect setting to sit and nibble a snack or sandwich. An island even can provide a quiet spot for children to do their homework, close to mom while she gets after school snacks or dinner together.

Take the opportunity to make your kitchen island mutli-functional because there’s lots of options to choose from. Just about any appliance can be built into it including cook tops, under-the-counter refrigerators, sinks, dishwashers and trash compactors. Deep drawers provide a place to store bulky cookware and pullout shelves allow for more easy access. Pick a countertop for your island that matches your other counters or make it stand out by using a contrasting material. Also, your choice of cabinetry and decorative elements can make your island into a real quality item, similar to a fine furniture piece.

The dimensions and placement of your kitchen island will depend on the shape and space available in your kitchen. Professionals say that the island should be positioned at least 36" from existing cabinets and 42" from the range, refrigerator or dishwasher to allow plenty of room for opening doors and easy maneuvering around your workspace area. The height of your kitchen island can vary to suit your individual needs. If you can't make up your mind on that one, a multi-level island might be the solution.

With all of the new trends in home design, kitchens have become an important part of the family’s living and entertaining space. If you don’t have the time or money to design your own island, there are many terrific ready-made islands you can order also. Take your time and choose the island that best suits your needs and taste so you are sure to enjoy it for many years to come.

Tips and info on planning your new kitchen island. Your one stop shop for build a kitchen island.

Article Source: http://EzineArticles.com/?expert=Nathan_T._Lynch

Tuesday, July 11, 2006

What to Avoid When Remodeling Your Home

When remodeling or improving your home, you should stop and look at the future before you make any decisions. Some day, your investment will have to be sold. And you will want to get as much out of it as you have put in it.

There are things that just hurt a home when you are trying to sell it. These are items that really seem important to you, but the majority of buyers don't want.

The number one example is a swimming pool. I would love to have an in-ground swimming pool at my house. But I know that it would not be a good investment.

It is expensive to clean, maintain and buyers aren't looking for swimming pools. Buyers don't want the troubles or the energy bills that come with swimming pools. Lenders don't include pools in the mortgage appraisal, so it really has no value to your home.

Another thing that can hurt you is overexpanding your home. Yes, buyers are looking for space, but you can have too much space. If you add on a family room, you are likely to see a 83% return on your investment. It costs you when you don't get back 100%. Adding a master suite to a home will grant you a recovery of only 80% of the cost of the addition.

It gets even worse if your additions make your home much larger than those in your area. This hurts your appraisal value, as there are no other homes of your size to compare to.

You shouldn't go too crazy with your changes either. Yes, there are a lot of people that would find a basement that looks like an old-time western saloon quite charming. But would they want to buy it? What if the basement was extra storage and a family room instead?

You would think that a home office would be a good addition. So many people work from home. Yet, it probably isn't wise to totally outfit a room to be an office by installing a workstation and office storage. You will recoup an average of 73% of your investment, according to the National Association of Realtors.

Another thing to avoid is doing too much by yourself. Shoddy or handmade workmanship will not benefit you. I know a couple that painted their brand new home themselves. The job was not great, as you can see paint on the ceiling throughout the home. Plus, the colors are quite unusual. To sell their home, they may find that it would have been better to have a professional paint in a neutral color scheme.

Try to keep your decor in your personal belongings, not the home itself. Faux finishes are lovely, but if they are too unusual, they may be a sticking point. You may love unusual colors, but remember, hot pink walls are not for everyone.

When you know you will be selling your home, it helps to spend your time only on renovations that will pay you back. Do the most important projects first.

The projects that show the greatest return at resale are improvements to siding, windows, kitchens and bathrooms.

A midrange bathroom renovation can give you a 102% return on the investment. An upscale bathroom renovation can recoup 93% of the cost. A midrange kitchen improvement will recoup approximately 91% of the cost. Minor jobs return 99%.

Keep in mind that the most important improvements aren't those that add to your home, they are those that maintain the home. Make sure the paint is in good condition, the gutters are clean and the lawn is kept up. Keep track of annual checkups, such as the heating and air servicing, and make sure you include the info when you are trying to sell your home. A well-maintained home is always a good seller.

Martin Lukac represents http://www.RateEmpire.com and http://www.1AmericanFinancial.com, a finance web-company specializing in real estate and mortgage rates. We specialize in daily updates, mortgage news, rate predictions, mortgage rates and more. Find low home loan mortgage interest rates from hundreds of mortgage companies!

Article Source: http://EzineArticles.com/?expert=Martin_Lukac

Monday, July 10, 2006

Home Remodeling is Definitely on the Rise

The Real Estate market has been moving forward at a fast pace. This market has begun slowing down a bit. Homeowners now appear to be staying home and adding onto their current home.

The long term growth in this area has been 5%. Currently the rise in the first quarter of this year is 4.5%. Impressive to say the least. This represents spending of $155 billion more than the amount spent in the previous 12 months.

The frenzy in home buying is definitely slowing down. Normally the spending associated with purchasing a new home usually lags behind. David A Seiders, chairman of the home builders group, says “The run-up in home sales during the past five years will fuel remodeling growth in the next several years, and the long-term growth looks very solid as well.”

This trend will provide more jobs in the home remodeling industry, including those entrepreneurs in the market place. The Kitchen and Bath Industry Show in Chicago seemed to indicate the growth seems to be in the upper end of the market. Big ticket manufacturers report 20 to 25 percent increase in the sales for the first quarter of 2006.

Many new products debut at the Kitchen and Bath Shows and May’s National Hardware Shows. Consumers are sure to find what fits their needs.

Another trend in the market place is using Glass Block to decorate the indoor and outdoor areas of homes and businesses. Glass block has been used in showers and windows for bathrooms in higher priced housing. Home owners are only limited by their imagination when considering this durable material.

Homeowners are not limited in finding new ways to remodel their homes. Changing cabinets, adding lighting, updating bathrooms can definitely improve the value and comfort of a home.

Nan Wood is an Accountant and RealEstate with an interest in home projects

HomeLighting

Article Source: http://EzineArticles.com/?expert=Nan_Wood

How to Save Money on Your Home Remodeling Supplies

You've got a budget, and you've got a plan for your home remodeling project. What about your home remodeling supplies? Where are you going to get them? How much will they cost? What's the best way to purchase home remodeling supplies?

Home remodeling supply can make or break your planed remodeling budget. Here are a few tips to make things a little easier for you:

Research Your Requirements

Before you start the home remodeling project do your research on everything you will need and want and most importantly the source from where you will get the needed supply. There are so many options, and contrary to what you might think, the "big box" stores aren't always the best.

Now, depending on the remodeling you have in mind, if it is a big job and you are planning to hire an architect, interior decorator or builder; or if it is a relatively small job and you will be doing it yourself, you will need supplies.

If you hire a contactor you need to specify clearly who will get the home remodeling supply. Sometimes contractors will supply the materials and if that is the case you also need to go through the cost and the type of supply that will be used. Specify everything clearly in detail; failing to do so will came back later to bite you when faced with supply quality or quantity issues. This will further bring additional costs, frustration and stress.

If you are in charge of providing the home remodeling supply you still have a lot of work to do; before you go to the store make a list with exactly what to need for each project. There are two reasons for this:

1. You will save money buying in bulk 2. You will save time not having to run two times for the same materials.

Planning Home Remodeling Supply

Planning is perhaps your most critical step. Without a good plan, you're doomed to pay far more than you can imagine. Take time to draw out a great plan. In construction, they'll figure that the planning process can take months, and (hopefully) they won't start until the plan is complete. A poor plan spells financial disaster every time.

Draw a plan with all details and material needed. Research online the availability of these supplies and the packages for the same. You will find that by doing your homework in the long run it will be rewarding.

When you have a good idea of what supplies you require for each project it will be hard for any contractor to trick you into getting poor quality material at high costs or even for any salesman to suggest what he/she wants to get rid of from the store.

Home remodeling supply will prove to save you a bunch of money in the end and still get the remodeling you dreamed of but, at the right cost and in the budget you had planned.

With a good plan and time for research, you can sometimes find great deals. On a recent bathroom remodel, for example, we found the perfect cabinet in a recycle center. It was brand new and in perfect condition. The contractor donated it because it didn't fit his client's project. Look around. Take your time. You'll be happier in the end.

Remodeling Your Home? Check out the latest tips at Basic Home Remodeling

Article Source: http://EzineArticles.com/?expert=Alice_Hunter

Friday, July 07, 2006

Swimming Pool Cover

Swimming pool covers come in a variety of shapes, sizes, and general types. There are solar swimming pool covers that work to keep the water warm as well as warm the water using the suns heat. Safety pool covers do just what it says it does, it keeps the swimming pool safe from unwanted entry of the humans or animals. In ground and above ground winter swimming pool covers, keep dirt, debris, and animals out of your pool during the winter season. It also prevents growth on the inside of your swimming pool that can be caused by the winter elements.

Here are a few things you should look for when shopping for a pool cover for your above ground or in ground swimming pool.

1. Find a swimming pool cover that is strong and sturdy. The cover should not only keep your swimming pool clean, it should add safety as well for humans and animals alike. It should prevent accidental drowning and dirt and debris from entering the pool.

2. Make sure the swimming pool cover conforms to state and local law requirements. Some areas require that a certain size and depth of pool be covered when not in use. There are specific requirements that these covers must meet. Check with your local authorities to ensure that your swimming pool cover meets the requirements needed.

3. Make sure your chosen swimming pool cover comes with a good manufacturer’s warranty. In general, the swimming pool cover should come with a warranty of longer than 2 years. It should definitely have a full 2-year warranty for all defects and longer for limited warranties. You only want a pool cover that can be trusted and is safe with a full warranty for a lengthy amount of time. you also need to be sure the company stands behind their products.

4. Make sure the pool cover has a good overlap length. You should buy a size that is a little larger than your pool. This will enable you to securely anchor the swimming pool cover without having to worry about not being able to cover your pool completely.

5. Make sure the swimming pool cover comes with enough parts to securely anchor the cover without worry of slippage. Most larger swimming pool covers come with a strap or anchor for every four feet of cover. You definitely want a good amount of anchoring so the cover will continue to be secure each time you use it.

There you have it! The top 5 things you should look for when you are buying a swimming pool cover for any size pool and for any material type. You can purchase quality swimming pool covers at your local swimming pool supply store or at any department store that sells swimming pool gear and supplies. Carefully read all instructions provided by the manufacturer and ensure that the cover meets all requirements in your local area. Always think safety first when you own a swimming pool.

David Evermon has been involved in many swimming pool construction and maintenance projects, David writes articles about pool cover for ZupaTips.com

Article Source: http://EzineArticles.com/?expert=David_Evermon

Laminate Wood Flooring-Choosing Between Laminate and Wood Flooring

If you are considering using laminate wood flooring in some or all of your home and are wondering about the difference between laminate and wood, you may get a lot of different opinions. Laminate wood flooring has been used in Europe for decades and only in the last 20 years or so has it become more popular in the United States. But, it is not for everyone and every situation. Before you choose laminate wood flooring for your home, you should compare the qualities of both wood and laminate.

1. Installation: In the last few years both laminate wood flooring and real wood floors have become easier to install. They often use some kind of interlocking system, where you fit strips together without the use of glue, nails or staples. But, although most laminate wood flooring is made this way now, a lot of real wood flooring is not. If you plan on installing the floor yourself, with real wood or laminate, you should consider using the interlocking system. Laminate can be installed over virtually any surface, but wood cannot be installed over some surfaces.

2. Durability: Real wood floors are durable for the long term, but they require a lot of care. If they are not specially treated with aluminum oxide they will scratch and stain fairly easily. Unlike laminate, it is also prone to fading if it is exposed to direct sunlight. Laminate wood flooring on the other hand, is resistant to both scratches and stains. Both types of floors can be damaged by excessive moisture, so care should be taken if they are used in a bathroom or kitchen.

3. Care: A damp mop is all that is required to clean laminate wood floors. Real wood floors will require polishing and refinishing occasionally. Wet spills should be cleaned up quickly on either type of floor to avoid it getting underneath the boards and damaging the floor.

4. Longevity: A real wood floor can last 25 years or more with proper care. Laminate will not last more than 20.

5. Cost: Real wood is generally more expensive than laminate.

Eriani Doyel writes articles for and about Laminate Flooring. For more information on laminate flooring visit buypergo.com.

Article Source: http://EzineArticles.com/?expert=Eriani_Doyel

Thursday, July 06, 2006

Home Improving while Budgeting

As we all know, budgeting and home improvement does not always go together but this article will give you information that could help improve your home and still save a little money.

Home improvement projects regularly scare people off, because many judge that they will pay thousands of dollars to alter one room, because they do not have the skills to do the job them self. They may also feel that the job is costly because supplies and tools are needed.

To the contrary, home improvement does not have to be costly at all. Of course, if you hire a subcontractor or contractor to do the job, you will pay a fortune, but if you have patience and the ability to read and stick to the directions, then you can renovate an whole room in your home for fewer than a hundred dollars. Of course, you will need to change and correlate materials.

Before starting the procedure of improving your home, you will need to system of funds and a schedule to get started. You will need to ponder various notions when considering and preparing home improvement. For example, do you plan to paint your home? Do you plan to tile your home? Do you want carpet in your home?

Going through the final part of this article, you will see just how important budgeting and home improvement can be done which will help save you money and improve your home.

Asking questions is part of analyzing and preparing for home improvement. One of the best tools to have when considering home improvement is calculating what you like and calculating what you want. When I improve my home the first thing I do is explore my mind searching for favorites and what excites and appeals to me. Thus, when I go to the home improvement warehouses, I already have in my brain what I am ready to purchase, therefore this relaxes my quest to improving my home.

If you are short of funds to improve your home, then setting up a financial plan will help you get what you want as well as put away some cash for a rainy day. You may even think about purchasing equipment and tools for home improvement at the companies that propose lower prices and/or purchases with no payments until a particular date. This notion will give you time to get your home better while putting away the currency to purchase the improvement equipment and tools.

Unfortunately, many people go for another home loan to enhance their home. Receiving loans from lenders regularly lead to debt, and home loans for improvement only leads to paying off your home twice. Thus, elude high interest rates and loan payments and learn to plan your finances to improve your home.

Let me give you a general view of what one area could cost you for repairs. Say you want to paint a specific room in your home. You will need plaster, sealers, primer, paints, paint thinners, scrapers, screwdriver, paint opening (often come with paint purchases), patches, paintbrushes, tray, and so forth. Now you may think this will cost you a lot of money to improve your home, but to the contrary, you are wrong.

The paint and tools will cost you the most, while the other items will be priced less; thus, primer, sealers and plaster be priced around fifteen dollars if you go to the correct store.

Paint thinners, trays, brushes and screwdriver will cost around fifteen dollars if you go to the right store. Thus, the patches should be purchased with a plaster kit, which will salvage you a few pennies. The paint will cost around twenty dollars per can, depending on the kind of paint purchased. Therefore, for around a hundred bucks you could alter a room in your home lacking hiring anybody to do the job providing you stick to the instructions.

What about the bathroom, can you alter the room on a financial plan? It depends on the range of the area, but if you are yearning to tile your bathroom and paint the walls you could get the job done for around a hundred bucks give or take. If you go to the correct home improvement store and know what you are doing, you could remodel a small bathroom or average bathroom for around fifty bucks.

Learning to create a financial plan and prepare for home improvements can help you to remodel your whole home (if the home is in good standings) for a few hundred dollars. Furthermore, completing the work yourself, you will recoup you thousands of dollars.

Having this budget and home improvement information handy will help you a great deal the next time you find yourself in need of it.

K Hoyng is the web master and operator of http://www.quickcash2u.com which is an excellent source of home improvement information and much more valuable information to help you. For information on home remodeling, visit us at http://www.quickcash2u.com/BathroomRemodeling.html.

Article Source: http://EzineArticles.com/?expert=Keith_Hoyng

Home Remodeling - Some Useful Tips

Home remodeling includes remodeling of various parts of your house such as kitchen, bathroom, lobby, sitting room, basement and all. Home remodeling is a complete package that gives a new and complete look to your home. With home remodeling, you also get to modify the exteriors and interiors of your home in a way that you want. Home modeling is now a common phenomenon amongst many home owners in many parts of the world. Home remodeling also lets you restructure your home and incorporate the latest trends and fashion.

However, there are a few things you need to consider before opting for home remodeling. First of all you need to hire a contractor to remodel your home (of course after you have done enough research find the best one; internet research is a good option). A contractor is a n expert and can also show you various options and designs. An expert will do a better job than you can do any day. Second, you need to have a budget for home remodeling. You need to keep some money aside for home remodeling. Also, keep in mind that during the process of home remolding, sometimes there are unanticipated expenditures. So, always have some funds aside for that.

You can choose either specialized contractor or general contractor for your tasks, depending on your requirements. Also, consult your friends and relatives when choosing a contractor. If possible, see their past works to get an idea of the quality of their work. Home renovation does not happen everyday, and when you get it done, ensure that you get the best.

For more tips and details please visit www.allremodel.com.

Natasha

Article Source: http://EzineArticles.com/?expert=Natasha_Salve